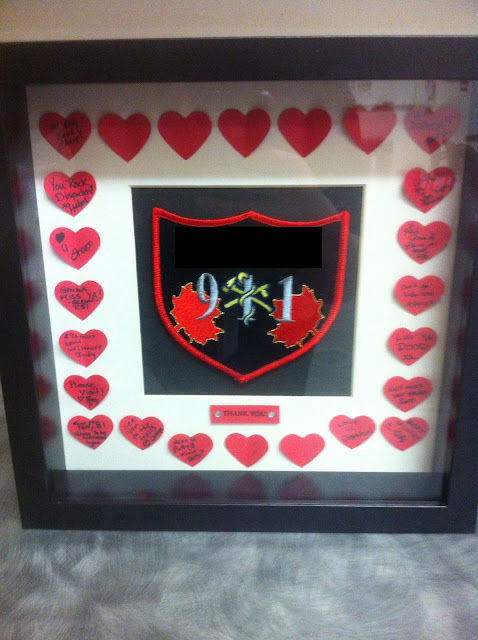
I used good 'ol Microsoft Paint to black out the name of our 911 centre, because I have already shared one silly 911 story with you and there may be more - I have to be careful!
Please click below to see more pictures & info!
My shift partner had been working as a 911 Dispatcher for a number of years. Usually when a Dispatcher leaves, they get a nice little Shadow Box with their uniform nametag, a shoulder crest, pins, and sometimes their uniform belt buckle. The funny thing is that for the last 4-5 years, it was my shift partner who put them together so nicely. She's really quite creative and good at those things.
So I put this little Guestbook Shadowbox together to give to her as well.
Materials:
-IKEA Ribba Shadowbox Frame, this one is 9x9
-Shoulder Flash I think is what it is officially called, but any crest or badge would do
-cardstock in complementing colour(s) - for the background and also for the little hearts
-heart punch or a steady hand or heart cutouts
-3D sticky dots to give the crest / badge / shoulder flash a little depth
-I also stamped Thank You onto a little piece of cardstock and put 2 rhinestones on either side
-glue for the hearts
-crisp fine-point pen - we used some sort of Sharpie pen that worked great
 |
| A little blurry... I had this out on the table for everyone to sign before the guest of honor showed up. |
 |
| Slightly less blurry - people will still filtering into the party & picking out a heart to write on. |
Back to the guestbook shadowbox:
- Mount the crest onto the cardstock backing using 3D glue dots
- Secure the cardstock to the mat with glue (not the 3D ones because your mat may not fit back into it's little groove in the frame if you 3D it!)
- Punch out a bunch of hearts out of cartstock - I used 25 hearts, but you could fit more hearts on there if you were having a larger party. The hearts could really be any colour that matches the crest, so long as you have some sort of pen that will show up. Even black would work with a high-quality gold or silver gel pen
- Fold the hearts vertically in half, and without overdosing the hearts in glue, delicately glue them onto the mat. Before I did anything with the glue I placed the hearts around the perimeter where I wanted them to make sure the spacing worked ok.
- You could stamp a little greeting like I did with the "Thank You", or just go without. Good Luck would have been appropriate too but I don't happen to have a good luck stamp! (For anyone that is wondering, my stamp came as part of a Stampin' Up set, and the ink was a basic Martha Stewart one.)
 |
| Some of the notes people wrote on the mini-hearts... |
In my opinion, it's nice that the hearts are so small, because you don't feel stressed about writing an entire paragraph!
 |
| And again the finished product! |
I saw similar projects on Etsy that are some sort of DIY package... I have some extra of these IKEA Ribba Shadowbox Frames kicking around... I could prepare a Giveaway for a Guestbook Shadow Box, but I'll only bother if I get 10 comments saying they'd want one as a prize. What do you guys think?
~Helen

No comments:
Post a Comment